5 Critical Signs You Need to Reinstall Windows for Optimal Performance

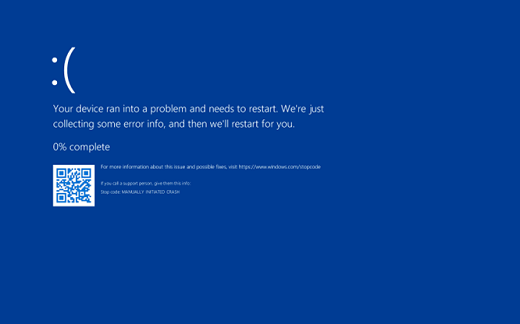
Windows operating systems are known for their robustness, but over time, even the most well-maintained system can start to degrade in performance. Whether it’s due to software issues, hardware conflicts, or other problems, there comes a point where a fresh reinstall of Windows is the best solution. In this blog post, we’ll explore the five critical signs that indicate it’s time to reinstall Windows to restore optimal performance. 5 Critical Signs You Need to Reinstall Windows for Optimal Performance 1. Blue Screen of Death (BSOD) The infamous Blue Screen of Death (BSOD) is a clear indication that something is seriously wrong with your Windows system. The BSOD appears when Windows encounters a fatal error that it cannot recover from without a reboot. While occasional BSODs might be caused by a minor driver conflict or software bug, frequent or recurring BSODs signal deeper issues, such as: If you find yourself constantly restarting your computer due to BSODs, it may be time to consider a full reinstall of Windows to wipe out corrupted files and restore system stability. 2. Unexplained Slowdown in Device Performance One of the most frustrating issues for any computer user is a significant slowdown in performance. If your once fast and responsive PC has become sluggish for no apparent reason, a reinstallation of Windows might be necessary. Common symptoms of performance slowdown include: While basic maintenance tasks like clearing temporary files or disabling startup programs can offer short-term relief, a clean reinstall often provides the long-term fix by eliminating old software clutter, orphaned files, and registry issues that drag down your system’s performance. 3. Corrupted System Files When critical Windows system files become corrupted, it can lead to a wide range of problems, including failed updates, application crashes, and erratic behavior. This corruption can occur due to: While some corrupted files can be repaired using Windows’ built-in tools, like System File Checker (SFC) or DISM, persistent corruption is often a sign that it’s time for a fresh start. Reinstalling Windows will replace all damaged system files, ensuring your system runs smoothly again. 4. Infection with Malware and Viruses In today’s digital world, no system is immune to the threat of malware and viruses. Even with solid antivirus protection, some infections can sneak through, severely damaging your system. Signs of a malware infection include: If malware has deeply embedded itself in your operating system, simply running an antivirus scan may not be enough. A full reinstall of Windows is sometimes the only way to completely eradicate the infection and restore a clean environment for your computer. 5. Failed Updates and Frequent Crashes Windows updates are designed to improve performance, enhance security, and fix bugs, but sometimes they can cause more problems than they solve. If your system fails to install updates correctly or crashes frequently after updates, it could be due to: A fresh installation of Windows clears out all these potential problems, ensuring you start with a clean slate and reducing the risk of future crashes and update issues. Conclusion If you’ve encountered any of these critical signs—BSODs, unexplained slowdowns, corrupted files, malware infections, or failed updates—it may be time to reinstall Windows for optimal performance. While reinstalling Windows may seem like a daunting task, the long-term benefits far outweigh the temporary inconvenience. By doing so, you’ll enjoy a faster, more reliable system that functions the way it was meant to. Keeping your system healthy and performing well is essential, and sometimes a complete reset is the best way to achieve that.

Read More »

Unable to Drag/Move Microsoft Teams Window | SOLVED

Unable to Drag/Move Microsoft Teams Window | SOLVED If you’re unable to drag or move the Microsoft Teams window on your computer, you’re not alone. This issue can be frustrating, especially when you need to multitask or reposition the window for easier access. Fortunately, there’s a solution. In this guide, we’ll explain why this problem occurs and how to fix it, with a focus on uninstalling and reinstalling Microsoft Edge Webview2—a core component that often causes this issue. What Causes the Microsoft Teams Window to Be Unable to Drag/Move? Several reasons can prevent you from dragging or moving the Microsoft Teams window. Here are the most common causes: How to Fix the Microsoft Teams Window Not Dragging or Moving There are several approaches to fixing this problem. One effective method is dealing with Microsoft Edge Webview2. Let’s walk through the steps to resolve the issue. Uninstall Microsoft Edge Webview2 Since Microsoft Teams relies on Edge Webview2 for rendering, uninstalling and reinstalling this component often solves the drag/move problem. But before diving into how to uninstall it, let’s first understand what Webview2 is. What is Microsoft Edge Webview2? Microsoft Edge Webview2 is a runtime component that allows desktop applications to embed web content using the Microsoft Edge engine. Many Windows applications, like Teams, rely on it for displaying web-based content within the app. If this component is corrupted or malfunctioning, it can affect how the app behaves, including window dragging and other UI-related actions. How to Uninstall Microsoft Edge Webview2 Uninstalling Microsoft Edge Webview2 is simple, and you can do it using two different methods: via the Control Panel or through the Command Prompt. 1. Using Control Panel Here’s how you can uninstall Webview2 from the Control Panel: If this method did not work, proceed with next method below in # 2. 2. Using a Command Prompt You can also remove or force uninstall Webview2 by running a command. Here’s how: After uninstalling, the problem might already be solved, but for optimal performance, reinstall Webview2 to ensure Microsoft Teams works correctly. How to Reinstall Microsoft Edge Webview2 Reinstalling Webview2 is easy and will ensure that Microsoft Teams and other applications relying on it can function properly. Once installed, check if you can now drag or move the Microsoft Teams window. Conclusion If you’re unable to drag or move the Microsoft Teams window, a likely culprit is the Microsoft Edge Webview2 component. By uninstalling and reinstalling Webview2, you can resolve the issue and restore normal functionality. If the problem persists, consider updating Microsoft Teams to the latest version or restarting your system to clear any temporary glitches. By following these steps, you should be able to regain control over your Teams window and enjoy a smoother experience.

Read More »

How to Troubleshoot Windows 10 / 11 Stuck in an Automatic Repair Loop

When your Windows 10 or 11 system gets stuck in an Automatic Repair loop, it can be frustrating and hinder your productivity. This guide will help you understand what Automatic Repair is, why it might fail, and how to resolve the issue effectively. What is Automatic Repair in Windows 10 / 11? Automatic Repair is a built-in troubleshooting tool in Windows 10 and 11 designed to fix common startup issues automatically. When Windows detects a problem preventing it from booting correctly, it launches the Automatic Repair tool to diagnose and repair the issue. What to Do if Windows 10 / 11 Automatic Repair is Not Working If your system is stuck in an Automatic Repair loop, several troubleshooting steps can help you fix the problem. Here’s a step-by-step guide: 1. Restart Your Computer 2. Boot Into Safe Mode 3. Run System File Checker (SFC) and DISM 4. Check Disk for Errors 5. Restore the System to a Previous Point 6. Reset Windows (With or Without Losing Data) If none of the previous methods work, you can reset your Windows 10 or 11 system. Windows provides an option to reset your PC while either keeping or removing your personal files. Here’s how to do it: To reset Windows: You will see two options: Steps to reset: Note: Always back up your important data before attempting a reset, even when choosing the “Keep my files” option, as unexpected issues can sometimes cause data loss. How to Disable Automatic Repair in Windows 10 / 11 If Automatic Repair is repeatedly failing and preventing your computer from booting, disabling the feature might be necessary to regain control over your system. Before we proceed, read the following carefully: Why Disable the Windows Automatic Repair? Disabling Automatic Repair can help you: Note: Automatic Repair is a useful feature, but disabling it should be a temporary solution to regain access to your system. Always aim to fix the underlying issue after disabling Automatic Repair. Steps to Disable Automatic Repair: How to Enable Automatic Repair in Windows 10 / 11 If you need to re-enable the Automatic Repair in Windows 10 / 11, follow the following steps, but before you proceed, it is important to quickly read the below. Why Re-enable Automatic Repair? You might want to re-enable Automatic Repair to: Note: While Automatic Repair is a valuable tool, it’s important to keep in mind that it won’t always be able to fix all issues. If problems persist, additional troubleshooting may be necessary. Steps to Enable Automatic Repair: Conclusion Getting stuck in an Automatic Repair loop can be frustrating, but with the right approach, you can fix the issue. Start with basic steps like restarting your PC and booting into Safe Mode. If needed, try advanced methods such as running system checks, resetting Windows, or disabling Automatic Repair temporarily. Remember, while disabling Automatic Repair can provide temporary relief, you should investigate and resolve the underlying cause of the problem to prevent it from recurring.

Read More »

Step-by-Step Guide: How to Reset a Forgotten Password in Windows 10 or Windows 11

Forgetting your Windows password can be frustrating, but fear not – there are several methods to regain access to your computer. Whether you’re using Windows 10 or the latest Windows 11, this step-by-step guide will walk you through various techniques to reset a forgotten password and get back into your system. How to Reset a Forgotten Password in Windows 10 or Windows 11 Password Reset Disk: Microsoft Account: Safe Mode: Command Prompt: Third-Party Tools: Conclusion: Forgetting your Windows password doesn’t have to be a nightmare. By following these step-by-step methods, you can regain access to your computer and resume your work without losing precious time. Whether you opt for a password reset disk, your Microsoft account, Safe Mode, Command Prompt, or third-party tools, there’s a solution for every situation. So, the next time you find yourself locked out of your Windows system, remember this guide and get back to using your computer hassle-free.

Read More »

8 Main Steps to Maintain Your Windows 10 / 11 Computer for Peak Performance

Maintaining your Windows computer is essential for ensuring optimal performance, security, and longevity. In this comprehensive guide, we’ll walk you through step-by-step instructions on how to implement the 8 main steps in maintain your Windows 10 / 11 computer for peak performance and running smoothly. 8 Main Steps to Maintain Your Windows 10 / 11 Computer: Discover the 8 main steps to effectively maintain your Windows 10 / 11 computer for optimal performance and longevity. Learn how to safeguard your system against common issues, boost speed, and enhance security, all while saving your hard-earned money by mastering do-it-yourself maintenance techniques. With our comprehensive guide, you’ll gain the knowledge and confidence to tackle computer upkeep like a pro, ensuring a smooth and efficient user experience every step of the way. Regular Software Updates In Windows 10: In Windows 11: System File Check, Check Disk and DISM Commands System File Check (SFC) Check Disk (CHKDSK) Note: Remember that running CHKDSK with the /f parameter will fix errors it finds on the disk. If you want CHKDSK to also locate and recover bad sectors, you can use the /r parameter instead, like this: chkdsk /r. However, running CHKDSK with the /r parameter can take significantly longer than running it with just the /f parameter. Microsoft Windows Deployment Image Servicing and Management (DISM) Note: DISM is particularly useful for repairing the Windows image when the System File Checker (SFC) tool cannot repair corrupted or missing system files. It’s a powerful tool for maintaining the health of your Windows installation. Disk Cleanup In Windows 10: In Windows 11: Manage Startup Programs Perform Disk Defragmentation Note: Do not proceed with this step if you storage drive is HDD, only proceed if it is SSD. Malware Protection Tip: There is an embedded software in Windows Operating System you can, it is called “Microsoft Windows Malicious Software Removal Tool”. Clean Temporary Files Update Drivers Manage Power Settings In Windows 10: In Windows 11: Monitor System Health Check for Hardware Issues Conclusion Regularly checking for hardware issues is crucial for maintaining the overall health and performance of your Windows 10 and Windows 11 computers. By following these detailed steps, you can identify and address potential hardware problems before they escalate and affect your system’s functionality.

Read More »

Common Windows Commands to Fix Your Computer Problems

Windows Commands to Fix Your Computer Problems Are you tired of wrestling with computer problems, only to find yourself drowning in a sea of complex solutions? Fear not! In this comprehensive guide, we’ll walk you through a collection of indispensable commands that will help you tackle common computer issues like a seasoned pro. From troubleshooting system errors to reclaiming precious disk space, these commands are your trusty companions in the digital realm. This article post equips you with a practical toolkit of essential commands to restore your computer’s optimal performance. As a best practice, it’s always recommended to create a backup of critical data before executing any unfamiliar commands. 1. CHKDSK (Check Disk) What is it?CHKDSK (Check Disk) is a Windows utility used to check the integrity of the file system and fix any logical file system errors on a disk. It scans the file system for errors caused by improper shutdowns, bad sectors, or other issues and attempts to repair them. When to use it: How to use it: 2. SFC (System File Checker) What is it?SFC (System File Checker) is a Windows utility that allows users to scan for and restore corrupted system files. It checks the integrity of critical system files and replaces any corrupted or missing files with the correct versions from the Windows installation media. When to use it: How to use it: 3. MDSCHED (Windows Memory Diagnostic) What is it?MDSCHED, or Windows Memory Diagnostic, is a tool built into Windows that helps diagnose problems with your computer’s memory (RAM). It scans your computer’s memory for errors, such as incorrect data or data that cannot be written, and reports any issues found. When to use it: How to use it: 4. DISM (Deployment Image Servicing and Management) What is it?DISM is a command-line tool used to service and repair Windows images. It is particularly useful for repairing the Windows system image, which includes Windows files, settings, and configurations. When to use it: How to use it: 5. NETSH INT IP RESET What is it?NETSH is a command-line scripting utility that allows you to display or modify the network configuration of a computer. The “NETSH INT IP RESET” command resets the TCP/IP stack to its default state, which can help resolve network connectivity issues. When to use it: How to use it: 6. IPCONFIG /FLUSHDNS What is it?IPCONFIG is a command-line utility that displays the current configuration of the IP stack on a networked computer. The “/FLUSHDNS” parameter is used to flush and reset the contents of the DNS resolver cache. When to use it: How to use it: Conclusion: Mastering these essential commands arms you with the tools needed to conquer a variety of computer woes. Whether you’re troubleshooting system errors, network connectivity issues, or reclaiming valuable disk space, these commands are invaluable assets in your tech arsenal. So, the next time you encounter a stubborn computer problem, fear not—empower yourself with these commands and emerge victorious in the digital battlefield.

Read More »

How to Remove Malware and Viruses from Windows 10/11 | The Comprehensive Guide

In an increasingly connected world, malware and viruses pose a significant threat to the security and stability of your Windows 10/11 computer. From ransomware attacks to spyware infections, malicious software can wreak havoc on your system, compromising your personal data and disrupting your workflow. However, with the right tools and knowledge, you can effectively remove malware and viruses from your Windows 10/11 PC and restore peace of mind. This guide will walk you through the steps to identify, quarantine, and eliminate malicious threats, ensuring that your system remains safe and secure. How Remove Malware and Viruses from Windows 10/11 Install Antivirus Software: The first line of defense against malware and viruses is a reputable antivirus software suite. Choose a comprehensive security solution that offers real-time protection, automatic updates, and advanced threat detection capabilities. Install the antivirus software on your Windows 10/11 computer and perform a full system scan to identify and quarantine any malicious software lurking on your system. Run Malware Removal Tools: In addition to antivirus software, there are specialized malware removal tools specifically designed to detect and remove stubborn threats that may evade traditional antivirus scans. Popular options include Malwarebytes, Spybot Search & Destroy, and AdwCleaner. Download and install one or more of these tools and run a thorough scan of your system to identify and eliminate any malware and viruses that may have slipped past your antivirus defenses. Boot into Safe Mode: Some malware and viruses are designed to resist removal by actively interfering with antivirus scans and security software. To bypass these defenses and remove stubborn threats, boot your Windows 10/11 computer into Safe Mode, which loads only essential system components and prevents malware from running. Once in Safe Mode, run your antivirus and malware removal tools to perform a thorough scan of your system and remove any detected threats. Restore from Backup: If your Windows 10/11 computer is severely infected with malware or viruses and traditional removal methods fail to resolve the issue, you may need to consider restoring your system from a backup. Windows includes built-in backup and restore functionality that allows you to create system image backups of your computer’s entire hard drive. If you have a recent backup available, use it to restore your system to a clean state, effectively removing any malware and viruses in the process. Practice Safe Computing Habits: Prevention is always better than cure when it comes to malware and viruses. To minimize the risk of infection, practice safe computing habits such as avoiding suspicious websites, being cautious when downloading files or attachments, keeping your operating system and software up-to-date with the latest security patches, and using a reputable ad blocker and pop-up blocker to reduce exposure to malicious advertisements. Conclusion: By following these proactive measures and taking swift action to remove malware and viruses from your Windows 10/11 computer, you can safeguard your system against digital threats and protect your personal data from unauthorized access or theft. Remember to stay vigilant, keep your security software updated, and regularly scan your system for potential threats to ensure a safe and secure computing experience.

Read More »

How to Optimize Windows Startup and Shutdown Times | The Complete Guide

In the fast-paced digital age, every second counts, and waiting for your computer to start up or shut down can feel like an eternity. Fortunately, there are several strategies you can employ to optimize the startup and shutdown times of your Windows computer, ensuring that you spend less time waiting and more time being productive. From minimizing unnecessary startup programs to fine-tuning system settings, this guide will walk you through the steps to streamline your computing experience and maximize efficiency. How to Optimize Windows Startup and Shutdown Times Minimize Startup Programs: One of the most effective ways to speed up the startup time of your Windows computer is to minimize the number of programs that launch automatically when you boot up. Many programs are configured to start automatically with Windows, which can prolong the startup process and consume system resources. To optimize startup times, use the Task Manager to disable unnecessary startup programs. Simply open Task Manager, navigate to the Startup tab, and disable any programs that you don’t need to launch automatically. Enable Fast Startup: Windows includes a feature called Fast Startup, which combines elements of traditional cold booting and hibernation to reduce startup times. When Fast Startup is enabled, Windows saves the current state of the system to a hibernation file when you shut down your computer, allowing it to boot up more quickly the next time you start it. To enable Fast Startup, open the Control Panel, navigate to Power Options, click on “Choose what the power buttons do,” and select “Turn on fast startup.” Optimize BIOS/UEFI Settings: Your computer’s BIOS (Basic Input/Output System) or UEFI (Unified Extensible Firmware Interface) settings can also impact startup times. By accessing your computer’s BIOS/UEFI settings, you can adjust various parameters related to hardware initialization and boot sequence, potentially improving startup performance. Common optimizations include disabling unnecessary hardware devices, enabling UEFI boot mode (if available), and adjusting boot priority settings to prioritize your primary boot drive. Check for System Updates: Outdated system software can contribute to longer startup times, as older versions of Windows may lack optimizations and performance improvements introduced in newer updates. Ensure that your Windows operating system is up-to-date by regularly checking for and installing the latest system updates and patches. Additionally, keep your device drivers and firmware updated to ensure optimal compatibility and performance. Perform Regular Maintenance: Routine maintenance tasks such as disk cleanup, disk defragmentation, and malware scans can also contribute to faster startup times by optimizing system performance and reducing unnecessary overhead. Use built-in Windows utilities such as Disk Cleanup, Disk Defragmenter, and Windows Defender to perform regular maintenance tasks and keep your system running smoothly. Conclusion: By implementing these optimization strategies, you can significantly reduce the time it takes for your Windows computer to start up and shut down, improving overall system responsiveness and user experience. Whether you’re a busy professional looking to maximize productivity or a casual user seeking a smoother computing experience, these tips will help you streamline your workflow and make the most of your time spent on your computer.

Read More »

How to Optimize/Speedup your Slow Windows 10/11 Computer

In today’s fast-paced digital world, a sluggish computer can be a major hindrance to productivity and efficiency. Fortunately, there are several strategies you can employ to optimize your Windows computer and ensure it operates at peak performance. From cleaning up disk space to tweaking system settings, this guide will walk you through the steps to unlock the full potential of your PC and streamline your computing experience. Optimize/Speedup your Slow Windows 10/11 Computer Clean Up Disk Space: Over time, your computer’s hard drive can become cluttered with temporary files, old documents, and unnecessary software. To free up valuable disk space and improve performance, start by running Disk Cleanup, a built-in Windows utility that identifies and removes unnecessary files. Additionally, consider uninstalling unused programs and transferring large files to external storage devices or cloud services to further declutter your hard drive. Optimize Startup Programs: Many programs are configured to launch automatically when you start your computer, potentially slowing down the boot process and consuming system resources. To optimize startup times, use the Task Manager to disable unnecessary startup programs. Simply open Task Manager, navigate to the Startup tab, and disable any programs that you don’t need to launch automatically. Manage System Resources: Windows includes several tools and utilities to help you manage system resources more efficiently. For example, the Performance Monitor allows you to track CPU, memory, disk, and network usage in real-time, helping you identify resource-intensive processes that may be slowing down your computer. Similarly, the Resource Monitor provides detailed information about how system resources are being used, allowing you to pinpoint bottlenecks and address performance issues accordingly. Update Device Drivers: Outdated or incompatible device drivers can cause a variety of performance issues on your Windows computer. To ensure optimal performance and compatibility, regularly update your device drivers using Windows Update or the manufacturer’s website. Additionally, consider using third-party driver update software to automatically scan for and install the latest driver updates for your hardware components. Defragment Your Hard Drive: Over time, files on your hard drive can become fragmented, meaning they are stored in non-contiguous clusters rather than in sequential order. This fragmentation can slow down file access times and degrade overall system performance. To improve disk performance, use the built-in Disk Defragmenter tool to defragment your hard drive regularly. Simply open Disk Defragmenter, select the drive you want to defragment, and click “Optimize” to start the process. Customize Power Settings: Windows offers several power plans that allow you to balance performance and energy efficiency based on your computing needs. To optimize power settings, open the Control Panel, navigate to Power Options, and select the power plan that best suits your preferences. You can also customize advanced power settings to fine-tune specific aspects of power management, such as processor performance and sleep settings. Conclusion: By implementing these optimization strategies, you can maximize the performance and efficiency of your Windows computer, ensuring a smoother and more responsive computing experience. Whether you’re a casual user looking to speed up your everyday tasks or a power user seeking to squeeze every last drop of performance from your system, these tips will help you achieve your goals and unleash the full potential of your PC.

Read More »
Blue Screen of Death

Blue Screen of Death (BSOD)

The Blue Screen of Death (BSOD) is an infamous sight for many computer users, striking fear and frustration into the hearts of even the most seasoned tech enthusiasts. Also known as a STOP error or system crash, the BSOD is a critical system error that forces your computer to restart unexpectedly. While encountering the BSOD can be alarming, it’s not necessarily the end of the world. With a deeper understanding of its causes and effective troubleshooting strategies, you can overcome the BSOD and restore your computer’s stability. Blue Screen of Death (BSOD) Error What Causes the Blue Screen of Death? The BSOD can be triggered by a variety of factors, ranging from hardware failures to software conflicts and system instability. Common culprits include faulty hardware components such as RAM, hard drives, or graphics cards, outdated or incompatible device drivers, corrupted system files, overheating, and malware infections. Identifying the specific cause of a BSOD can be challenging, but thorough investigation and diagnostic tools can help pinpoint the underlying issue. Troubleshooting the Blue Screen of Death: When faced with the dreaded BSOD, the key is to remain calm and methodical in your approach to troubleshooting. Start by taking note of any error codes or messages displayed on the screen, as they can provide valuable clues about the nature of the problem. Next, try restarting your computer and booting into Safe Mode, which can help isolate the issue by loading only essential system components. From there, consider the following troubleshooting steps: By methodically troubleshooting each potential cause, you can often resolve BSOD errors and restore your computer’s functionality without resorting to drastic measures like reinstalling the operating system. Preventing Future BSODs: While some BSOD errors may be unavoidable due to hardware failures or unforeseen circumstances, there are steps you can take to minimize the risk of encountering them in the future. These include: Conclusion: The Blue Screen of Death may be a formidable foe, but armed with knowledge and a systematic approach to troubleshooting, you can conquer it. By understanding the underlying causes, implementing effective troubleshooting strategies, and taking proactive measures to prevent future occurrences, you can restore stability to your computer and navigate the digital realm with confidence. Remember, when faced with the BSOD, don’t panic—embrace the challenge as an opportunity to deepen your understanding of technology and emerge victorious.

Read More »