5 Critical Signs You Need to Reinstall Windows for Optimal Performance

Windows operating systems are known for their robustness, but over time, even the most well-maintained system can start to degrade in performance. Whether it’s due to software issues, hardware conflicts, or other problems, there comes a point where a fresh reinstall of Windows is the best solution. In this blog post, we’ll explore the five critical signs that indicate it’s time to reinstall Windows to restore optimal performance. 5 Critical Signs You Need to Reinstall Windows for Optimal Performance 1. Blue Screen of Death (BSOD) The infamous Blue Screen of Death (BSOD) is a clear indication that something is seriously wrong with your Windows system. The BSOD appears when Windows encounters a fatal error that it cannot recover from without a reboot. While occasional BSODs might be caused by a minor driver conflict or software bug, frequent or recurring BSODs signal deeper issues, such as: If you find yourself constantly restarting your computer due to BSODs, it may be time to consider a full reinstall of Windows to wipe out corrupted files and restore system stability. 2. Unexplained Slowdown in Device Performance One of the most frustrating issues for any computer user is a significant slowdown in performance. If your once fast and responsive PC has become sluggish for no apparent reason, a reinstallation of Windows might be necessary. Common symptoms of performance slowdown include: While basic maintenance tasks like clearing temporary files or disabling startup programs can offer short-term relief, a clean reinstall often provides the long-term fix by eliminating old software clutter, orphaned files, and registry issues that drag down your system’s performance. 3. Corrupted System Files When critical Windows system files become corrupted, it can lead to a wide range of problems, including failed updates, application crashes, and erratic behavior. This corruption can occur due to: While some corrupted files can be repaired using Windows’ built-in tools, like System File Checker (SFC) or DISM, persistent corruption is often a sign that it’s time for a fresh start. Reinstalling Windows will replace all damaged system files, ensuring your system runs smoothly again. 4. Infection with Malware and Viruses In today’s digital world, no system is immune to the threat of malware and viruses. Even with solid antivirus protection, some infections can sneak through, severely damaging your system. Signs of a malware infection include: If malware has deeply embedded itself in your operating system, simply running an antivirus scan may not be enough. A full reinstall of Windows is sometimes the only way to completely eradicate the infection and restore a clean environment for your computer. 5. Failed Updates and Frequent Crashes Windows updates are designed to improve performance, enhance security, and fix bugs, but sometimes they can cause more problems than they solve. If your system fails to install updates correctly or crashes frequently after updates, it could be due to: A fresh installation of Windows clears out all these potential problems, ensuring you start with a clean slate and reducing the risk of future crashes and update issues. Conclusion If you’ve encountered any of these critical signs—BSODs, unexplained slowdowns, corrupted files, malware infections, or failed updates—it may be time to reinstall Windows for optimal performance. While reinstalling Windows may seem like a daunting task, the long-term benefits far outweigh the temporary inconvenience. By doing so, you’ll enjoy a faster, more reliable system that functions the way it was meant to. Keeping your system healthy and performing well is essential, and sometimes a complete reset is the best way to achieve that.

Read More »

How to Troubleshoot Windows 10 / 11 Stuck in an Automatic Repair Loop

When your Windows 10 or 11 system gets stuck in an Automatic Repair loop, it can be frustrating and hinder your productivity. This guide will help you understand what Automatic Repair is, why it might fail, and how to resolve the issue effectively. What is Automatic Repair in Windows 10 / 11? Automatic Repair is a built-in troubleshooting tool in Windows 10 and 11 designed to fix common startup issues automatically. When Windows detects a problem preventing it from booting correctly, it launches the Automatic Repair tool to diagnose and repair the issue. What to Do if Windows 10 / 11 Automatic Repair is Not Working If your system is stuck in an Automatic Repair loop, several troubleshooting steps can help you fix the problem. Here’s a step-by-step guide: 1. Restart Your Computer 2. Boot Into Safe Mode 3. Run System File Checker (SFC) and DISM 4. Check Disk for Errors 5. Restore the System to a Previous Point 6. Reset Windows (With or Without Losing Data) If none of the previous methods work, you can reset your Windows 10 or 11 system. Windows provides an option to reset your PC while either keeping or removing your personal files. Here’s how to do it: To reset Windows: You will see two options: Steps to reset: Note: Always back up your important data before attempting a reset, even when choosing the “Keep my files” option, as unexpected issues can sometimes cause data loss. How to Disable Automatic Repair in Windows 10 / 11 If Automatic Repair is repeatedly failing and preventing your computer from booting, disabling the feature might be necessary to regain control over your system. Before we proceed, read the following carefully: Why Disable the Windows Automatic Repair? Disabling Automatic Repair can help you: Note: Automatic Repair is a useful feature, but disabling it should be a temporary solution to regain access to your system. Always aim to fix the underlying issue after disabling Automatic Repair. Steps to Disable Automatic Repair: How to Enable Automatic Repair in Windows 10 / 11 If you need to re-enable the Automatic Repair in Windows 10 / 11, follow the following steps, but before you proceed, it is important to quickly read the below. Why Re-enable Automatic Repair? You might want to re-enable Automatic Repair to: Note: While Automatic Repair is a valuable tool, it’s important to keep in mind that it won’t always be able to fix all issues. If problems persist, additional troubleshooting may be necessary. Steps to Enable Automatic Repair: Conclusion Getting stuck in an Automatic Repair loop can be frustrating, but with the right approach, you can fix the issue. Start with basic steps like restarting your PC and booting into Safe Mode. If needed, try advanced methods such as running system checks, resetting Windows, or disabling Automatic Repair temporarily. Remember, while disabling Automatic Repair can provide temporary relief, you should investigate and resolve the underlying cause of the problem to prevent it from recurring.

Read More »

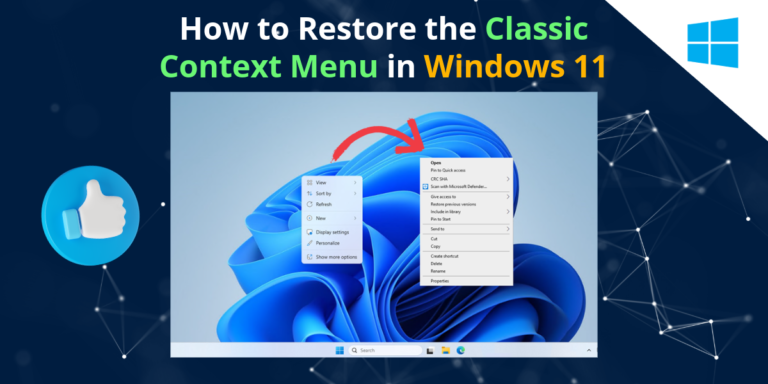
How to Restore the Classic Context Menu in Windows 11: A Step-by-Step Guide

How to Restore the Classic Context Menu in Windows 11 The context menu in Windows 11 has a sleeker and more modern design compared to previous versions. While some users appreciate the change, others find it less functional or slower for certain tasks. If you’re one of those who prefer the old-style context menu from Windows 10 or earlier, this guide will show you how to revert to the classic context menu in Windows 11. Why Restore the Classic Context Menu? Before we dive into the steps, it’s worth understanding why many users prefer the classic context menu: Step-by-Step Guide to Revert to the Classic Context Menu To get back the old context menu, you’ll need to make a small change to the Windows registry. Don’t worry if this sounds complicated – follow the steps below carefully, and you’ll be back to the classic layout in no time. Step 1: Open the Registry Editor Step 2: Navigate to the Correct Registry Path Once the Registry Editor is open, you need to navigate to a specific path: Step 3: Add a New Registry Key Step 4: Create a New Subkey Step 5: Modify the New Subkey Step 6: Restart Your Computer After modifying the registry, you’ll need to restart your computer for the changes to take effect. Once your computer reboots, you should now see the classic context menu when you right-click on your desktop or inside File Explorer. How to Revert Back to the Windows 11 Context Menu If you ever want to go back to the new context menu, simply reverse the changes: Alternative: Using a Third-Party Tool If editing the registry isn’t something you’re comfortable with, there are several third-party tools available that can automate the process for you. Tools like Winaero Tweaker allow you to customize the appearance and behavior of Windows 11, including restoring the classic context menu with just a few clicks. Final Thoughts The updated context menu in Windows 11 may look cleaner, but for those who prioritize functionality and speed, the classic menu can be a better fit. By following the simple steps above, you can quickly revert to the old-style menu and enjoy a more familiar Windows experience. Remember to always back up your registry before making any changes, and if you’re unsure about any steps, consider using third-party tools to simplify the process.

Read More »

What Information The VPN Can And Cannot Hide

In an age where online privacy is a growing concern, Virtual Private Networks (VPNs) have become increasingly popular. They promise to shield our internet activities from prying eyes, but what exactly can they hide, and what remains exposed? This blog post delves into the fundamentals of VPNs, the types available, and the information they can and cannot conceal. What is a VPN? A Virtual Private Network (VPN) is a service that encrypts your internet connection, providing a secure tunnel for your online activities. By routing your traffic through a remote server, a VPN masks your IP address and makes your browsing more private and secure. Key Features of VPNs: What are the Types of VPN? VPNs come in various forms, each catering to different needs and use cases. Here are the primary types: 1. Remote Access VPN 2. Site-to-Site VPN 3. Personal VPN 4. Mobile VPN What Information The VPN Can And Cannot Hide Understanding what a VPN can and cannot hide is crucial for managing your expectations regarding online privacy. What a VPN Can Hide: What a VPN Cannot Hide: Conclusion VPNs are powerful tools for enhancing online privacy and security, but they are not a panacea. They effectively conceal your IP address, location, and browsing activity, ensuring that your internet traffic is encrypted and secure. However, they cannot hide everything, such as your account information, device details, or activity on unencrypted websites. Understanding these limitations is essential for making informed decisions about your online security. By combining VPN usage with other security practices, you can significantly bolster your privacy in the digital world. By integrating a VPN into your online routine, you can take a significant step towards safeguarding your privacy. However, always stay informed about the capabilities and limitations of your chosen VPN to ensure comprehensive protection.

Read More »

Ultimate Guide of Personal Vault on OneDrive

What is Personal Vault on OneDrive? Personal Vault on OneDrive is a secure area in your OneDrive where you can store your most sensitive files and photos. This feature provides an extra layer of protection for your important documents, ensuring they are safely guarded behind a second step of identity verification, such as a fingerprint, face recognition, PIN, or a code sent to your email or SMS. Why You Need Personal Vault on OneDrive? How to Use Personal Vault on OneDrive? How to Enable and Use OneDrive Personal Vault in Windows OneDrive Download link How to Enable and Use OneDrive Personal Vault in iPhone How to Enable and Use OneDrive Personal Vault in Android Conclusion OneDrive’s Personal Vault offers an extra layer of security for your most sensitive files. Whether you are using a Windows PC, iPhone, or Android device, setting up and using Personal Vault is straightforward and provides peace of mind knowing your important documents are securely stored. By following the steps outlined in this guide, you can ensure that your files are protected against unauthorized access, giving you confidence in your data’s safety.

Read More »

How to Setup IMAP/POP3 Email on Windows Computer

Setting up your email on a Windows computer using IMAP or POP3 can streamline your communication, ensuring you can access your emails efficiently. Whether you prefer the synchronization capabilities of IMAP or the offline access provided by POP3, this guide will walk you through the necessary steps to configure your email client correctly. What are IMAP, POP3, and SMTP Protocols? Understanding the difference between IMAP, POP3, and SMTP is essential before diving into the setup process. What Port Numbers are Needed? Configuring your email requires knowing the correct port numbers: Prerequisites Before you begin, ensure you have the following: How to Setup IMAP/POP3 Email on Windows Computer Setup IMAP/POP3 Email on Windows Mail App Setting up your email using IMAP or POP3 on the Windows Mail app is a straightforward process that allows you to manage your emails efficiently. This guide will walk you through each step to configure your email account properly. Follow these steps to configure your email account: Setup IMAP/POP3 Email on Windows Outlook App Setting up your email using IMAP or POP3 on the Windows Outlook app is an essential task to ensure efficient email management. This guide provides a step-by-step process to configure your email account correctly in Outlook. Follow these steps to set up your email account: Setup IMAP/POP3 Email on Windows Thunderbird App Setting up your email using IMAP or POP3 on the Windows Thunderbird app ensures efficient email management. This guide provides a comprehensive step-by-step process to configure your email account correctly in Thunderbird. Follow these steps to set up your email account: Conclusion Setting up your email using IMAP or POP3 on the Windows Mail, Outlook or Thunderbird app is a straightforward process if you follow the correct steps and have the necessary information. By understanding the roles of IMAP, POP3, and SMTP, and using the appropriate port numbers, you can ensure a smooth configuration. With your email account set up correctly, you’ll be able to manage your emails efficiently on your Windows computer using Thunderbird. If you encounter any issues, refer to your email provider’s support resources or contact their customer service for additional assistance. Enjoy!

Read More »

Top 3 Tools to Customize Your Windows Taskbar

Top 3 Tools to Customize Your Windows Taskbar Your Windows taskbar is your gateway to efficient navigation and multitasking on your computer. While Windows offers a standard taskbar setup, you can elevate your user experience by customizing it to suit your preferences and needs. In this blog post, we’ll explore three top-notch tools that allow you to personalize and enhance your Windows taskbar. Whether you’re a Windows 10 or 11 user, these tools are sure to take your desktop customization to the next level. StartAllBack StartAllBack is a powerful tool designed to bring the classic Windows 7 Start Menu experience to your Windows 10 or 11 taskbar. With StartAllBack, you can regain familiar features and functionalities, such as the traditional Start Menu layout and customization options. This tool seamlessly integrates into your system, providing a smooth and efficient way to access your favorite apps, files, and settings. Whether you miss the simplicity of older Windows versions or crave enhanced functionality, StartAllBack is a must-have customization tool for your taskbar. NiceTaskbar NiceTaskbar is a versatile taskbar customization tool that offers a range of features to enhance your Windows experience. From color customization to advanced taskbar management options, NiceTaskbar empowers you to tailor your taskbar according to your preferences. With its intuitive interface and user-friendly design, NiceTaskbar makes it easy to personalize your desktop and streamline your workflow. Whether you’re a casual user or a power user, NiceTaskbar provides the tools you need to make your taskbar truly your own. TranslucentTB TranslucentTB is a lightweight and customizable tool that allows you to add transparency effects to your Windows taskbar. With TranslucentTB, you can create a sleek and modern look for your desktop while maintaining full functionality of the taskbar. This tool offers various customization options, including transparency level, color settings, and taskbar icon management. Whether you prefer a subtle transparency effect or a more pronounced aesthetic, TranslucentTB gives you the flexibility to tailor your taskbar to your liking. Best of all, TranslucentTB is completely free to use, making it a top choice for users seeking both style and functionality. Conclusion Customizing your Windows taskbar not only adds a personal touch to your desktop but also enhances your overall user experience. With the right tools, such as StartAllBack, NiceTaskbar, and TranslucentTB, you can transform your taskbar into a powerful productivity hub that reflects your unique style and preferences. Whether you prefer classic functionality, advanced customization options, or modern aesthetics, these tools have you covered. So why settle for the default taskbar when you can customize it to suit your needs? Try out these top tools today and take your Windows experience to new heights!

Read More »

Top 5 Websites to Download Stunning Windows Themes for Free

Are you looking to give your Windows desktop a fresh, personalized look? Downloading and installing a new theme can transform your computer experience. Here are the top 5 websites where you can download stunning Windows themes for free. We’ve also included a handy guide on how to install these themes and a conclusion summarizing the benefits of customizing your desktop. 1. Microsoft Store The Microsoft Store is the official source for Windows themes. It offers a wide range of themes, from serene landscapes to dynamic cityscapes, all optimized for Windows 10 and 11. The themes are free and easy to install directly from the store. 2. DeviantArt DeviantArt is a community of artists where you can find unique and creative Windows themes. The site offers an extensive collection of themes designed by talented artists, ensuring a variety of styles and aesthetics. Be sure to read the installation instructions provided by the theme creators. 3. ThemePack.me ThemePack.me is dedicated to Windows themes and provides a vast selection of high-quality themes for free. The website is user-friendly, with themes categorized by genre, making it easy to find the perfect one for your desktop. 4. ThemeBeta ThemeBeta is a well-known site for Google Chrome themes, but it also offers a variety of Windows themes. The site allows users to create and share their themes, providing a unique and personalized experience for Windows users. 5. SkinPack SkinPack offers both free and premium Windows themes. The site features themes that can completely overhaul the look of your desktop, giving you a new visual experience. Be sure to check the compatibility of the theme with your version of Windows before downloading. How to Install a Windows Theme Installing a Windows theme is a straightforward process. Follow these steps to give your desktop a new look: Conclusion Customizing your Windows desktop with a new theme can make your computer more enjoyable to use and reflect your personal style. The websites listed above offer a variety of stunning themes for free, allowing you to transform your desktop with just a few clicks. Whether you prefer minimalist designs, vibrant colors, or intricate art, there’s a theme out there for you. Download a new theme today and give your Windows desktop a fresh look!

Read More »

Step-by-Step Solutions for Common Excel Problems

Excel is a powerful tool used by millions for everything from simple calculations to complex data analysis. However, even seasoned users can run into common problems that can slow down productivity. In this guide, we’ll explore step-by-step solutions to some of the most frequent Excel issues. Whether you’re a beginner or an experienced user, these tips will help you navigate Excel with ease. The solutions provided in the article are generally applicable to both Mac and Windows versions of Excel, but there are some interface differences and feature availability that might vary slightly between the two platforms. Below are some adjustments to make sure both Mac and Windows users can follow along smoothly. 1. Fixing Slow Performance Problem: Excel runs slowly, especially with large datasets. Solution: 2. Resolving Circular References Problem: Excel displays a circular reference warning, which can cause incorrect calculations. Solution: 3. Dealing with #DIV/0! Errors Problem: You see a #DIV/0! error when a formula attempts to divide by zero. Solution: 4. Handling Date and Time Formatting Issues Problem: Dates and times are not displayed correctly or are treated as text. Solution: 5. Fixing Broken Links in Formulas Problem: Formulas that reference external workbooks or sheets show broken links. Solution: 6. Managing Large Data Sets Problem: Excel struggles to handle large data sets, leading to crashes or slow performance. Solution: 7. Recovering Lost Work Problem: Excel crashes and you lose unsaved work. Solution: 8. Preventing Data Entry Errors Problem: Incorrect data entry leads to calculation errors. Solution: 9. Fixing Merged Cells Issues Problem: Merged cells cause problems with sorting and filtering. Solution: 10. Automating Repetitive Tasks Problem: Repetitive tasks consume a lot of time. Solution: By following these step-by-step solutions, you can overcome common Excel problems and enhance your productivity. Remember, practice makes perfect, so keep exploring and learning new Excel tips and tricks. Happy Excelling! Conclusion Navigating common Excel problems can be frustrating, but with these step-by-step solutions, you can overcome many of the challenges that slow down productivity. Whether you’re dealing with slow performance, circular references, data entry errors, or formatting issues, these tips and tricks will help you manage and optimize your work efficiently on both Mac and Windows platforms. Remember, mastering Excel is a continuous learning process, and the more you explore its features, the more proficient you’ll become. Stay curious, keep practicing, and soon you’ll be an Excel expert. For ongoing tips, tricks, and updates, be sure to subscribe to our newsletter. Happy Excelling!

Read More »

How to Fix Microsoft Excel Crashes and Freezes on Windows / Mac

Microsoft Excel is a powerful tool used by millions worldwide for data analysis, budgeting, and more. However, frequent crashes and freezes can be frustrating and hinder productivity. Whether you’re using Excel on Windows or Mac, these issues are common but solvable. In this guide, we’ll explore practical solutions to fix Microsoft Excel crashes and freezes, ensuring a smoother experience on both platforms. How to Fix Microsoft Excel Crashes and Freezes on Windows / Mac 1. Update Excel and Office Suite Keeping Excel and the entire Office suite updated is crucial. Microsoft regularly releases updates that fix bugs and improve performance. To update Excel: 2. Disable Add-Ins Add-ins can sometimes cause Excel to crash or freeze. To identify and disable problematic add-ins: If Excel runs smoothly after disabling add-ins, enable them one by one to identify the culprit. 3. Check for Conflicting Programs Certain programs can conflict with Excel, causing it to crash. Common culprits include antivirus software and other real-time scanning tools. To test this: If Excel stabilizes, consider adjusting the settings of the conflicting program or consulting the software’s support team for further guidance. 4. Repair Office Installation Repairing your Office installation can fix corrupted files that cause crashes. Here’s how: 5. Clear Excel Cache A corrupted Excel cache can cause crashes and freezes. Clearing the cache can resolve these issues: 6. Adjust Excel Settings Optimizing Excel settings can improve performance and reduce crashes. Here are a few adjustments: Disabling hardware graphics acceleration can prevent conflicts between Excel and your system’s graphics drivers. 7. Check for Disk Space and Memory Issues Excel requires sufficient disk space and memory to function properly. Ensure your system meets the following requirements: 8. Reinstall Excel As a last resort, reinstalling Excel can resolve persistent issues. Ensure you back up your data before proceeding. Conclusion rashes and freezes in Microsoft Excel can disrupt your workflow, but these solutions can help you troubleshoot and resolve the issues. By keeping Excel updated, managing add-ins, checking for conflicting programs, and optimizing settings, you can enhance your Excel experience on both Windows and Mac. If problems persist, consider seeking further assistance from Microsoft Support. By following these steps, you can enjoy a smoother, more reliable Excel performance and get back to focusing on your important tasks.

Read More »